Return Ballots Batches
To access: Ballot By Mail > Scan Return Envelopes
Mail ballot envelopes include a section for the voter’s signature and a specific bar code. Texas law requires that the Signature Verification Committee (SVC) compare the signature image(s) from the voter’s record to the signature on the voter’s mail ballot return envelope. With Voter Focus, you scan the ABBM and scan the returned envelope. After the ABBM and envelope images have been indexed to the voter for an election, the committee members compare the signatures side by side using the Return Ballots Queue.
The Return Ballots Batches dialog allows you to scan or import mail ballot returned envelopes, and then review and release the images for verification.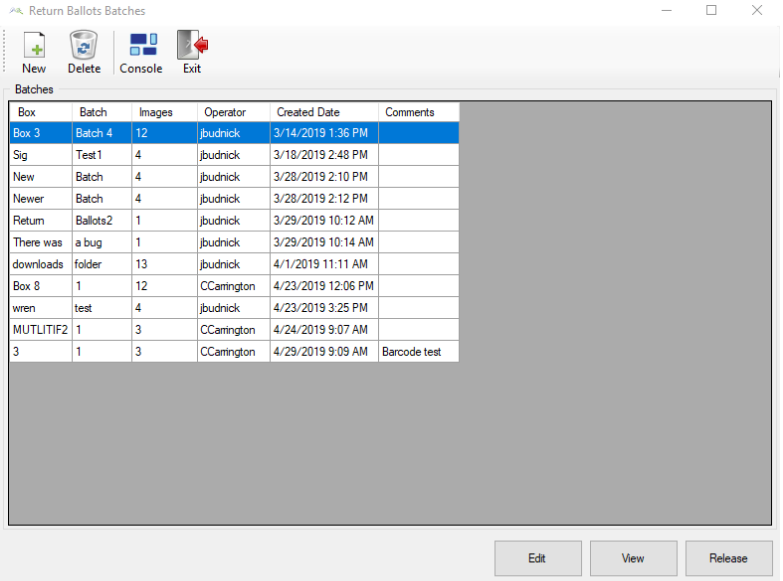
Fields and Controls on this Dialog
| New | Display the Batch Info dialog to add a new batch of returned envelope images using unique box and batch descriptions to assign the organizational structure for the batch. Batches are used to group similar or related images. You also have the option to add a comment. Tip: For your future reference, the box and batch numbers as well as the assigned sequence number display on the Doc Images tab in voter records for images that were created in a batch. |
| Delete | Delete a selected batch. |
| Filters and Pagination |
You can use the following to locate the row containing the batch to review:
|
| Edit | Display the Batch Info dialog to change the box description, the batch description, or the comment. |
| View | Display the Batch Images dialog for an existing selected batch to:
Verify that a scanner machine is connected to your computer and is turned on. Some scanners must be turned on before the computer is turned on, so if you have problems connecting to the scanner, power down both machines. Then power-up the scanner first, before you power-up the computer. Place the batch of forms into the scanner infeed with the top of each document going into the scanner first. You will be able to rotate an improperly oriented image later if you need to, but it saves time if all documents are facing the same way. When scanning a two-sided or multi-page document, verify the first page scanned contains the signature. This allows you to clip the signature from the first page in the batch so the system will display the signature with the correct page on the Comms tab in voter records. Tip: For possible future reference, bundle the scanned paper documents from this batch
in the same order as they were
scanned. Note: If you receive an error advising you the image is too large, see Image File Size for ways you can reduce the size. Tip: Verify all images and only the images you want to import are located in one folder. Import adds all images in the folder you select. All images from the scan, import, or both are included in the batch. Important:
Note: The system uses only the county's election bar code and not those from other entities, such as the post office. |
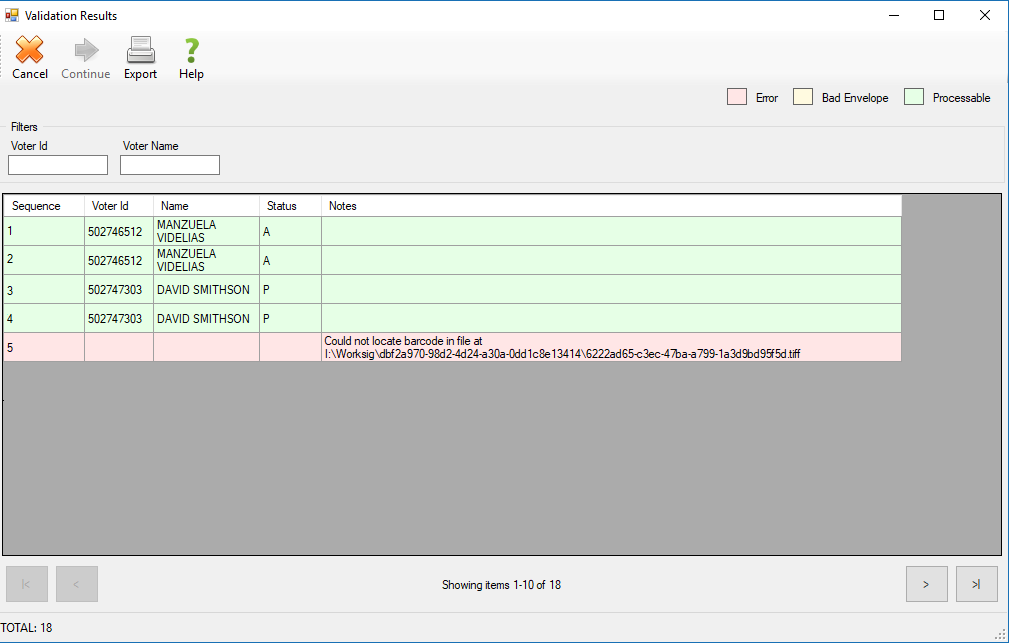
| Release |
Display the Validation Results dialog with the following color coding:
Do the following:
|